How do I add a site to the system?
Steps
-
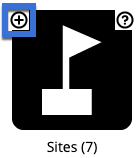
Click on the [Knowledge] tab and use the 'Add Site' option found on the top-left of the [Sites] icon.

-
Alternatively, click on the [Sites] icon and then the 'Add Site' link.

-
Fill out the information for the site name, date and description. You can also add a photo to the site by clicking on the button to choose a file from your computer/network. Select the correct coordinate system and type in the GPS coordinate. This will create a point at the location you specify. You can edit the point later and provide a more detailed map representation. If you do not have a coordinate for the site, you can add this later.
-
For more information about how to add/edit the map representation of your site, see editing the map representation.
-
Select sharing rules for the site.
-
See How do I set visibility permissions for an entry? for more information about viewing and editing permissions.
-
Click on the [Create] button to add the site into the system with the information and map representation you've provided.

-
To make edits to the map representation or site information of an existing entry, click the [Edit] link next to the site name.
