How do I set visibility permissions for an entry?
Introduction
All users other than ‘Read-only’ users are permitted to add and edit content within the system. When any new content is added to the system, the user is prompted to set ‘Sharing Rules’, which determine which user groups are permitted to view and edit that content.
If the user wishes to share their content with groups they are not a member of (e.g. a ‘Public’ group), this will require the approval of an administrator (see How do I authorise shared entries?). This is to avoid users from wrongly sharing sensitive content with unsuitable user groups.
Steps
Setting Sharing Rules
-
To set visibility permissions for an existing entry, click on the [Edit] (pencil) icon associated with that entry.

-
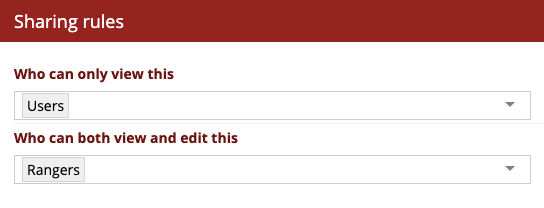
Scroll down to the 'Sharing Rules' section. Using the dropdown boxes shown below, the user can select which user groups can view the content, and which groups can both view and edit the new content.
The two permissions to define are:
-
Viewing permission - 'Who can only view this' - allows members of a user group to see the information about your photo.
-
Editing permission - 'Who can both view and edit this' - allows members of a user group to view and edit the information about your photo.
-
Note: If you don't define any sharing rules, that means that only you will be able to see the photo and nobody one else will.

-
Removing Sharing Rules
-
To remove sharing rules from an existing entry within the system, first navigate to the appropriate entry and click 'Edit'.

-
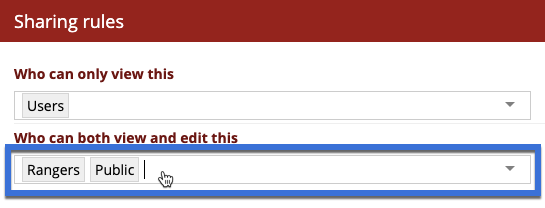
Scroll down to the 'Sharing Rules' section and click on the dropdown box you wish to edit. A blinking cursor will now be visible in the text box.

-
To remove a user group, tap [Backspace] on your keyboard. The user group immediately to the left of your cursor will then be removed. In the example below, a 'Public' user group is removed.

-
Click 'Update' to save your changes.