What is the browse page and how is it used?
Introduction
A browse page is used to summarise the existing entries for a particular form. In general, these existing entries will be displayed in a table containing summary information about each entry. This article will introduce the different elements of a typical browse page, where they are laid out on the screen and how they can be used to add, filter and edit existing entries.
Steps
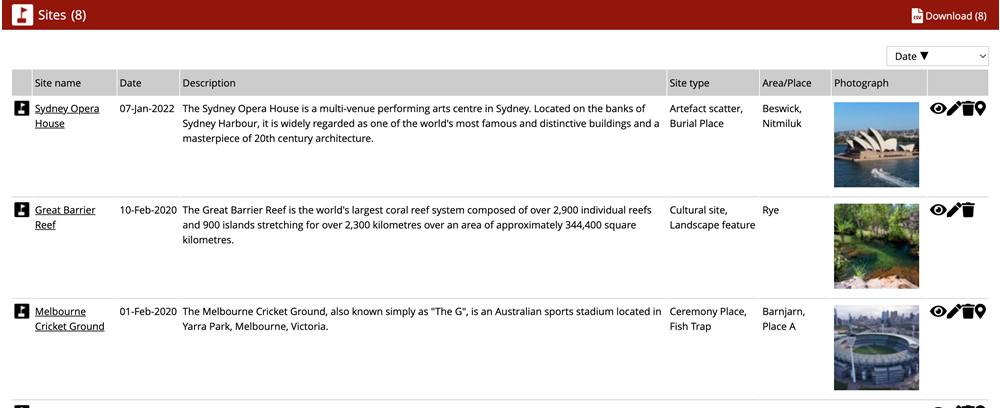
This screenshot shows a typical browse page, in this case for the 'Sites' form. The following sections of this article will describe the various elements contained in this screenshot and how they can be used.

Main toolbar
The main toolbar is located at the top of every browse page. In this example, there are four buttons in the toolbar:

-
Sidebar - toggle sidebar visibility
-
Map - toggle map visibility
-
Site - add a new entry to the 'Sites' form
-
Locate - centre the map on your current location (you may be prompted to allow this action by your browser).
Sidebar
The sidebar is located at the left of a browse page and contains additional information and filtering options. If the sidebar is not visible, you can make it reappear by clicking the button in the main toolbar (see above).

-
Information - this section provides extra context for the current form, and may include a description of the form, why it is significant or how data is collected for the form, as well as a representative image.
-
Filters - this section allows the user to restrict the entries shown to only those that meet certain conditions. For example, the 'sites' shown in this example could be filtered to only those containing the word 'water', or to only those of a particular site type.
Map
Depending on the current form, a map may also appear at the top of the screen on the browse page. The map depicts the locations of the entries shown in the main content section (see How do I view and edit the map representation?).

Main Content
The main content section summarises the existing entries for the current form, including tools to view, sort, edit, delete, and download these entries.

-
Download - download the table as a .csv file

-
Sorting - the table of entries can be sorted by a particular field (in either ascending or descending order) using the select box at the top-right of the table.

-
Entry tools - these tools are located to the right of each entry within the table:

-
View - navigate to the full entry and view the answers to all questions
-
Edit - navigate to the full entry and add or change existing answers to all questions
-
Delete - delete the entry
-
Show entry on map - centre the map on this entry
-