How do I manage user accounts?
Introduction
To manage information in a culturally sensitive manner within the system, it is important that every user of the system is registered. This allows rules to be set for controlling what each user is able to see and do within the system.
Steps
User Registration
-
The typical process for registration is for the user (or someone on their behalf) to complete a form in which they nominate a username (for identifying themselves uniquely) and a secret password (for accessing the system). The user also provides some basic contact information.
-
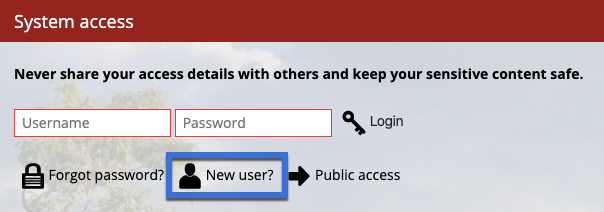
From the [Login] page, applicants can click the ‘New User’ link and fill out the form as prompted. Once their details have been submitted, their account will be disabled until it is authorised by an administrator.

-
The user can then be informed that their account is active, and instructions can be provided as to how they can access the system. Each new user must be approved by an administrator in this way.
Authorising User Registration Requests
-
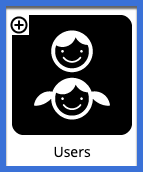
Administrators can grant access to new applicants by first navigating to the [Settings] tab, then clicking on the [Users] icon.


-
The [Users] page lists all users that have applied to access the system. Beside each user will be an ‘Approve/Disable’ link that allows administrators to toggle to user’s status from approved to disabled. Click ‘Approve user’ next to any of the users listed to activate that user’s account.

User Management Tools
System administrators can access and modify various features of user profiles. This includes editing basic details such as email, as well as assigning the user to specific groups and user roles within the system.
-
To access the user management tools, click on the [Settings] tab and select the [Users] link (as described above).
-
Here you fill find a list of all the current users in the system, along with a set of options for managing each user.

- Click on the option you wish to edit. See below for a description of each of these options.
-
Profile - this section allows administrators to edit the basic profile details including email, contact details etc. Additionally, administrators can nominate if the user is permitted to share entries with other user groups even if they are not members of those groups.
-
Groups - this section allows administrators to assign the user to specific user groups. Select the appropriate user groups using the checkboxes. Additionally, administrators can nominate the system role the user is given. See What are the different user roles within the system? for more details.
-
Approve/Disable - this link toggles the user between approved and disabled. This tool is used when approving a new registered user.
-
Reset password - this tool resets the password of the user account. The administrator will have to advise the user of the new password before they will be able to access the system. The user can then change the password once logged in.
-
Delete user (and reassign account) - this tool deletes the user account and gives the administrator the ability to assign the ownership of existing entries in the system to another user account.
-
User Groups and Roles
Administrators are responsible for assigning each user to appropriate user groups. These groups control what content the user can see when using the system. This ensures sensitive information held within the system is kept secure. The groups defined in a particular system are dependent on the dynamics of the community. Examples of user groups include gender groups, work groups and family groups. See How do I create a new user group? for information about how to add a new user group into the system. Users can be assigned to one or more groups.
The administrator also assigns each user to an appropriate role, which determines what the user can do within the system. See What are the different user roles within the system? for a description of the different roles that that may be assigned to a new applicant.